
Installing Motion with a Raspberry Pi Camera
Motion by default doesn’t support the Raspberry Pi Camera so we will need to do a different setup for it to work. However we will still get a really good Raspberry Pi Webcam server by doing this.
Note: This method doesn’t work on the Raspberry Pi 2, please head over to the security camera page for a working tutorial.
Installing the Hardware
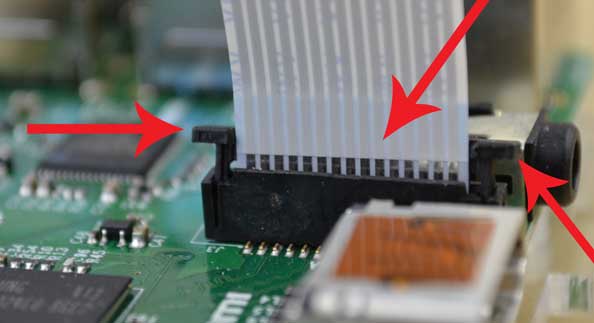
In order to install the Raspberry Pi camera we will need go to the ribbon cable slot on the Pi and with two fingers on each side of the connector pull up. This should now open the connector, now insert the ribbon cable with the metal leads facing away from the Ethernet Port.
Once you have lined it up gently press the connector back down and the cable should now be locked in one place.
Installing the Software
Now to get the Raspberry Pi Webcam stream up and going we will need to install the required software. This process is different to the above method.
- Firstly we need to ensure the camera is switched within raspi config.
Enter the following command and then enable the camera.sudo raspi-config - Next let’s update Raspbian and its packages
sudo apt-get update
sudo apt-get upgrade- Let’s also check and update the camera firmware if required.
sudo apt-get install rpi-update
sudo rpi-update
sudo reboot- Now time to install motion to do this enter
sudo apt-get install motion
sudo apt-get install libjpeg62
- Now lets create a directory in your home called mmal
cd ~/
mkdir mmal
cd mmal- Now we need to download dozencrow’s motion program using:
wget https://www.dropbox.com/s/xdfcxm5hu71s97d/motion-mmal.tar.gz - Now we will need extract the file
tar -zxvf motion-mmal.tar.gz
- Now we need to edit the config file to do this enter the following line:
sudo nano motion-mmalcam.conf- Now we will need to make several changes to the config file the following lines should be changed so they appear like the this:
- width 640
- height 480
- target_dir /home/pi/mmal/m-video
- output_pictures off
- logfile /home/pi/mmal/motion.log
- stream_maxrate 100
- framerate 100
- Now you can test it out by using the following command:
./motion -n -c motion-mmalcam.conf- Now quit the process by typing ctrl+c
- This isn’t very good if you ever want to work on the Pi without disrupting the motion camera. To get around this we will write some scripts that can be called to easily stop and start the process. You can download these scripts here or you can simply keep following this tutorial.
- First lets create a file called startmotion by typing the following command:
sudo nano startmotion- Now let’s type the following into the folder (A text editor (Nano) should be open)
#!/bin/sh
nohup /home/pi/mmal/motion -n -c /home/pi/mmal/motion-mmalcam.conf 1>/dev/null 2>&1 </dev/null &- Now let’s make the stop script by typing the following:
sudo nano stopmotion - Now in the editor enter these two lines
#!/bin/sh
killall motion- Now we need to make both of the scripts executable by running the following commands:
sudo chmod 755 startmotion
sudo chmod 755 stopmotion- Now if you type either
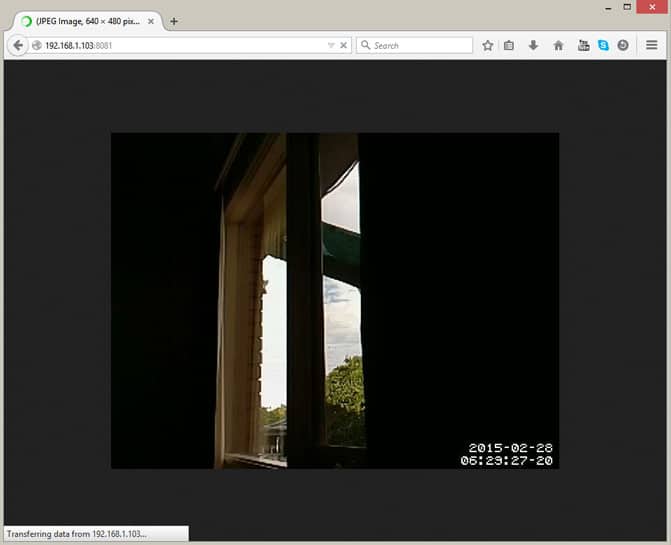
./startmotionor./stopmotioneither start or stop the script and not disable the terminal so you can do other work if needed. These commands will only work if you’re inside the folder. If you want to call these outside you will need to use the following:/home/pi/mmal/startmotionor/home/pi/mmal/stopmotion - You should now be able to access the webcam stream by going the Pi’s address on port 8081.
eg: 192.168.1.103:8081
You should now have a fully working Raspberry Pi camera server that is accessible within your local network. If you want to allow external access to the camera then please follow my instructions below.
Setting up outside External Access
In order to provide external access to your Raspberry Pi Webcam Server we will need to change some settings in the router. However all routers are designed differently so you will probably need to look up your own brand.
This is what I did on mine in order to get it to work. My router is an AC1750 TP-Link Router.
- Go to the Router admin page (This will typically be 192.168.1.1 or 192.168.254)
- Enter the username and password. Default typically is admin & admin.
- Once in go to forwarding->Virtual Server and then click on add new
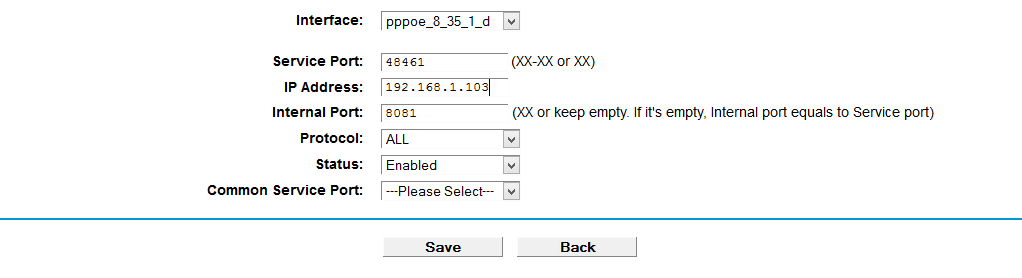
- In here enter:
- Service port: In this case 48461
- IP Address: 192.168.1.103 (Address of your Pi)
- Internal Port: We want this to be the same as the service so 8081
- Protocol: All
- Status: Enabled
- These settings will route all traffic destined for port 48461 to the webcam server (192.168.1.103)
- You should now be able to connect to the Raspberry Pi webcam stream outside your network. You may need to restart the router for changes to take effect.
If they are unable to connect you can try the following:
- Check your router settings and confirm they are correct.
- Check your IP hasn’t changed (Some IPs will provide you with a dynamic IP rather than a static IP) You can setup something called dynamicdns to counter this you can find out more information here.
- Restart the router.
I hope you have enjoyed this tutorial on how to build a Raspberry Pi Webcam server if you want more then please check out all my Raspberry Pi projects I currently have to date! There will many more coming in the future.
I got this information from here.